
Your navigation menu (nav menu, for short) is the list of clickable page options that appears in the header and footer of your website. These are the main pages you want or expect visitors to explore, and most commonly consist of base pages like "Home," "About," and "Contact."
Many Bookshelf website templates are built with these base pages already included, though some will vary depending on the intention or goal of that particular template. You may also want to add or remove any nav menu options and related pages that aren't as relevant to your particular site, so we've made the process of creating nav menus manual rather than automatic anytime a new website page is created.
This way, you can create a variety of nav menus for a single site that each link to a variety of pages that are completely customizable, meaning your header and footer can have different menus, or you can switch between various menus at-will, allowing you to test how each one works for certain page visitation and conversion rates.
How to Edit a Navigation Menu
First, it's important to note that adding a new page to your website will not automatically list that page in your current nav menu. The page will still exist as part of your website, but to actually add a visible link to the page in your menu, follow the steps below.
Open your website in the Page Builder, then click on Settings in the lower left corner:

This page brings you to all the back-end settings for your website. To access your nav menu settings, click Menus on the left side:
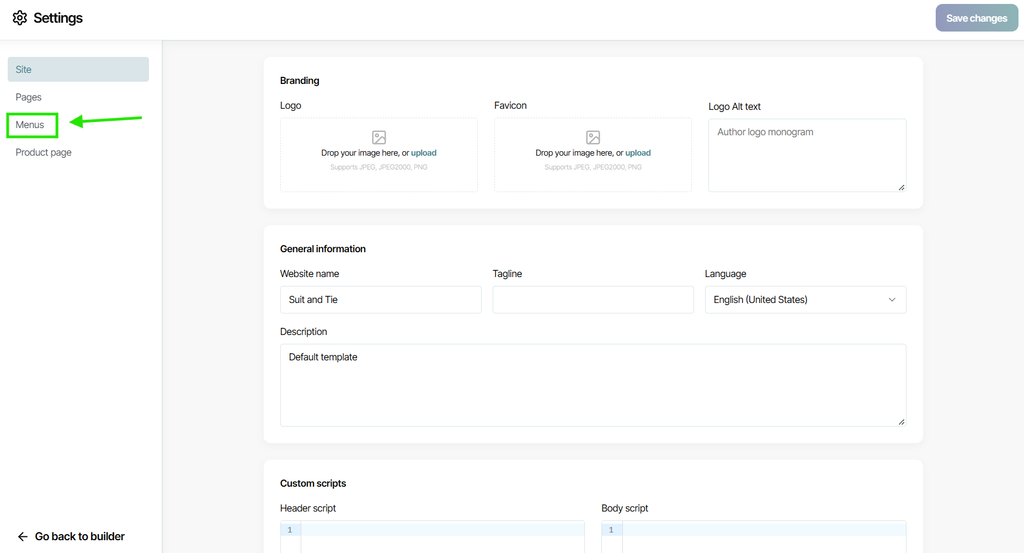
On this page, you'll find your current, default nav menu listed as "Site Menu." This displays all the pages currently visible in your nav menu on your website, showing both as a "preview" of how they are listed side-by-side*, as well as an editable list at the bottom where you can add, remove, edit, or rearrange the menu items as you'd like.
*Note that the Preview box does not show the actual design of your nav menu; it's only a generic example of how the selected pages and arrangement will appear.
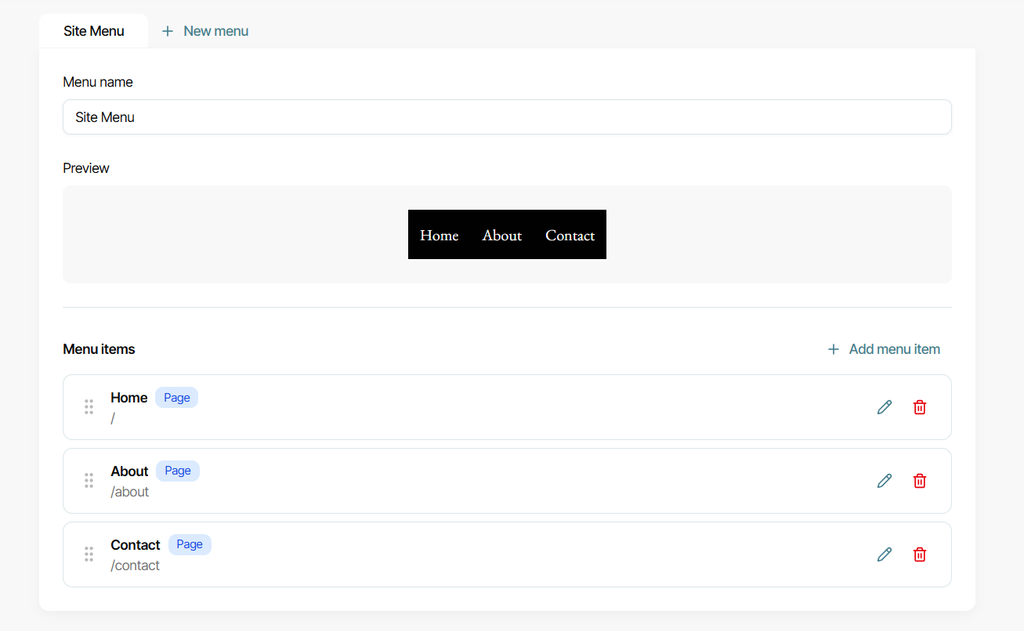
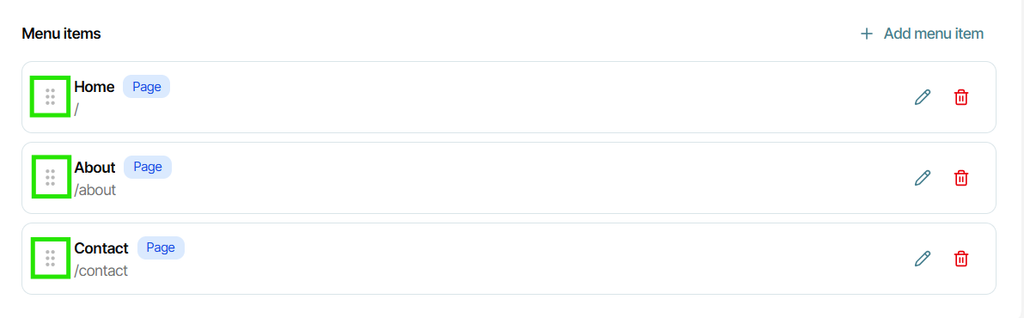
To change the order of items in your nav menu, click and drag the six dots to the left of the page name in the Menu Items list. From left to right, the item at the top of the list will always appear first, and the item at the bottom will always appear last. You can also see an example of the order by looking at the "Preview" area.
To change how the name of a page appears within the nav menu or change the URL portion for that specific page as well, click on the pencil icon all the way to the right of the page you want to change.
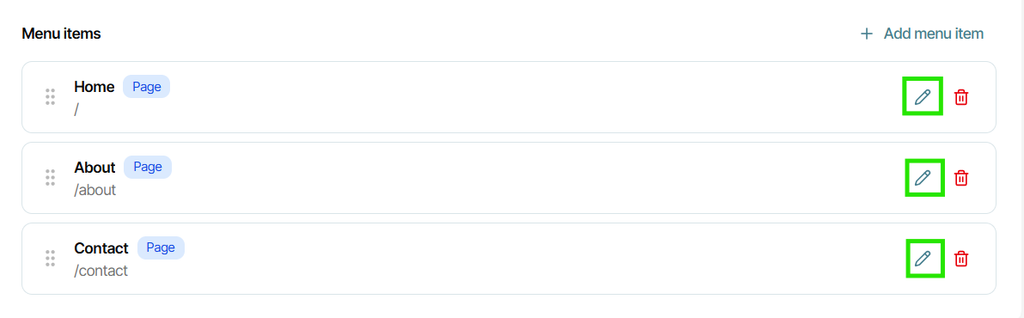
This will pull up that page's naming, URL, and some visibility settings.
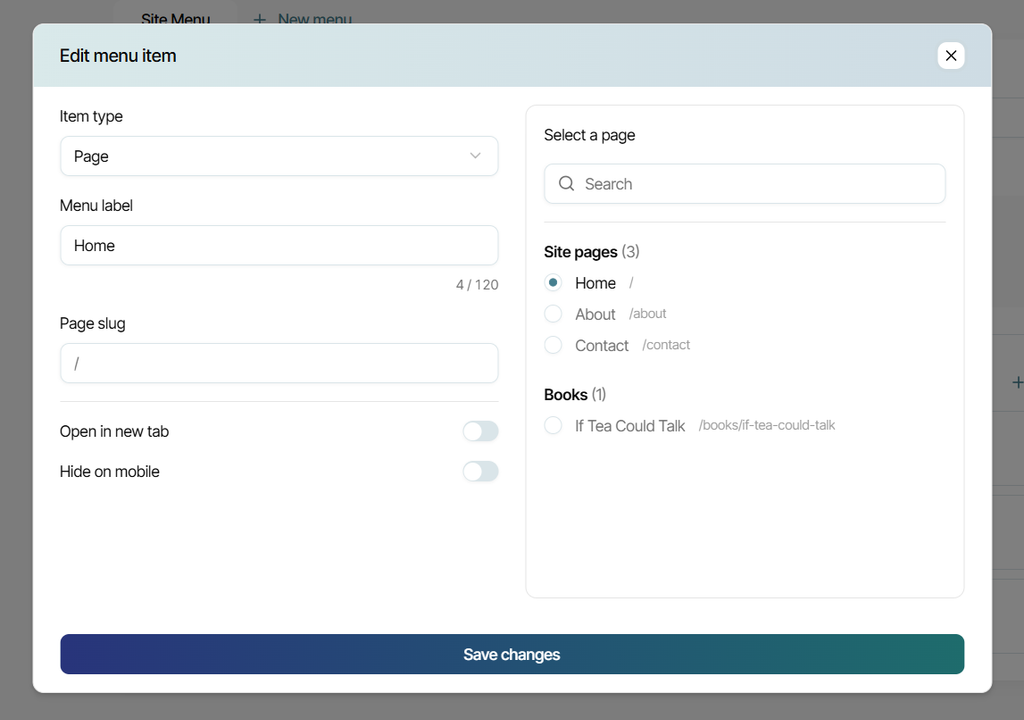
It's important to note that changing the "Menu Label" setting does NOT change the actual name of this page in the back-end metadata of your website; it will only change how it's labeled in the nav menu.
Here, you can also change the Page Slug, which is the portion of the website URL for this page that gives the page its address on the web. For example, in authorsite.com/about, the "about" part is the page slug. It's always advised to make your slug match either the menu label or the back-end metadata name of the page itself, and between the two, preferably the metadata. This helps to keep the pages of your website clearly catalogued and identifiable.
You can also quick-select pages of your website on the left side to change the specific nav menu item you have open to that page.
After you're done, click the blue "Save Changes" button to navigate back to the Menus page.
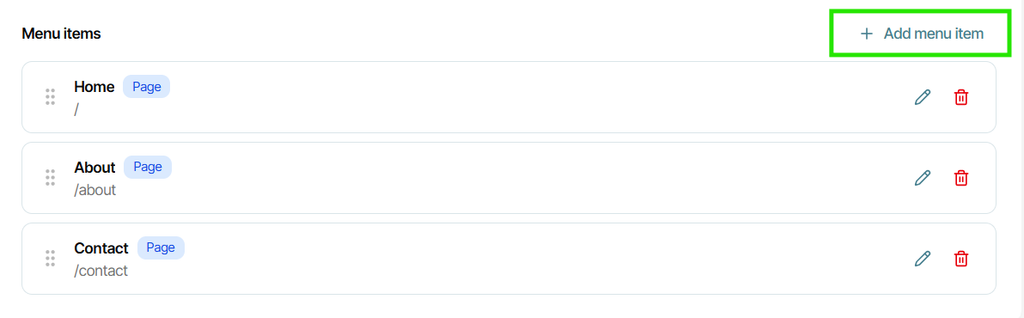
To add a brand new page to your nav menu, click the blue "+ Add Menu Item" link above the right side of your item list:
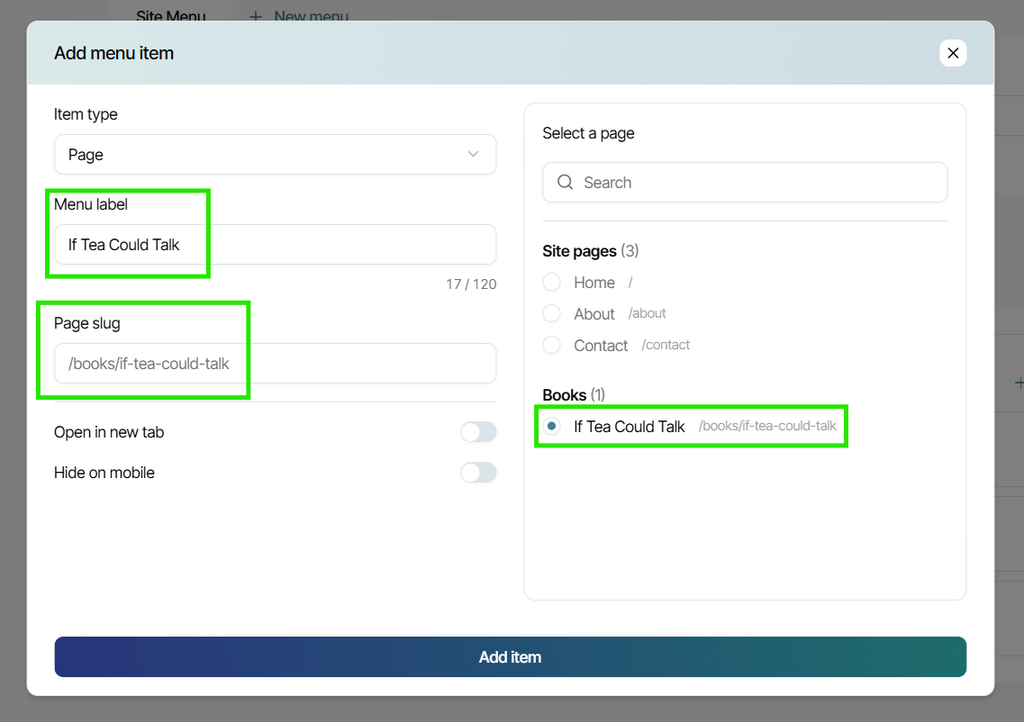
This will open a nearly identical edit window to the one that opens when you click on an already-existing page's edit options, and functions exactly the same way. Just note that to add a page to your nav menu, the page must first exist in your website project itself. By selecting one of these pages from the list on the right, some information for the page will auto-fill. Make any adjustments as needed, then click "Add Item."
You'll be taken back to the Menus page, where you'll see the new page has now been added to your nav menu. Be sure to click the blue "Save Changes" button in the top right corner before heading back to the main Page Builder by clicking "Go Back to Builder" in the bottom left corner.
A Few Tips and Ideas
- You can currently add an unlimited number of items to a nav menu, though we recommend keeping it under 10. Instead, utilize "nesting," whereby you can have the main, categorical item listed in the nav menu, and then add sub-items related to that category listed underneath them with an automated list drop-down feature. Settings for this nesting feature can be set when you create the nested page itself, rather than in the nav menu settings.
- You can name your pages anything you'd like, but when it comes to listing them in your nav menu, we recommend keeping things as short and concise as possible. Page names that get too long will be cut off after a certain number of characters, and ellipses (...) will be placed at the cutoff instead. Keeping things short is a good general practice for making visitor navigation across your site as easy and clear as possible.
- You can create multiple navigation menus within a single website project, but only one can be used for the header or footer at a time. Your header and footer can also have separate menus, but both will default to using the main "Site Menu" until manually changed. To change which menu your header or footer features, you'll edit the "Navigation" settings of your header or footer itself under Style settings.
- The author name or author logo you add to your header and footer automatically defaults to functioning like a "Home" button, meaning whenever a visitor clicks on it, they'll be taken back to the homepage of your website. So while most website templates provided by The Bookshelf do include a "Home" option as part of their nav menu, you can always opt to delete from your Site Menu it if preferred, and still know that your site will have a way for visitors to return to your homepage.